Hey guys, so I’ve spent a ton of time getting all these self-signed SSL certificates to work with Trellis/Bedrock/Sage, and I finally just figured out what I believe is the last step - getting it to work on the Gulp localhost proxy.
Basically, here’s what I did:
Use this tutorial to generate a self-signed SSL. For the “domain name” (I forget exactly what it’s called), use localhost. Just follow the prompts and it will create all 3 of the files for a fully certified(?) self signed certificate. You can put it anywhere, and I’m not sure where it “should” go. Maybe someone else can answer that?
Modify your gulpfile.js:
Go to line ~250 (within the gulp.task('watch'... function)
Below line 251 (proxy: config.devUrl,), add the following block of code: https: { key: config.devSsl.key, cert: config.devSsl.crt },
You should now have that “https” block between the “proxy” line and the “snippetOptions” block.
Modify your manifest.json:
Just below the "devUrl": "https://yoursite.dev" line, add the following block of code: "devSsl": { "key": "D:\\path\\to\\your\\cert.key", "crt": "D:\\path\\to\\your\\cert.crt" }
Of course, set the paths to the stuff you just generated with the above tutorial.
Open Chrome’s settings page and toggle the advanced settings, and then click “Manage certificates…” under “HTTPS/SSL”
On this “Certificates” window that’s just opened, go to the “Trusted Root Certification Authorities” tab and press the “Import” button on that tab.
Follow the wizard and browse to the certificate you just generated, and install it to Chrome! You should be able to just use the default options in the “wizard” thing, but if it asks where you want to add the certificate, make sure it’s being added to the trusted root certification authorities store.
At this point, I’d say you should run a chrome://restart to be safe, and then just go ahead and run gulp watch within sage, and now when the proxied localhost comes up, you should have the green lock!
I don’t know if this really matters, as it seems that browser sync was able to bypass the typical issues with a non-accepted certificate, but it was something that annoyed me, so I figured maybe it’s annoying someone else, and thankfully the fix is pretty simple.
Here’s what the SSL indicator looks like in my browser (Chrome dev channel on Windows 7):
Hopefully this helps someone else! I figured I should at least make an attempt to give back what little knowledge I have, given the great support this community has always provided me when I’ve needed it.
NOTE: I’ve also managed to get the self-signed ssl working for Trellis on my local dev site (just browsing to mysite.dev instead of using the browser sync proxy). I believe I posted a thread about that before, but if anyone is having trouble getting SSL working on Trellis/Bedrock in general, feel free to reply here and I’ll write up what I did to get that working as well. In that case, it was necessary, as the site just would not load at all without it due to the HSTS or whatever that I believe Bedrock is using to ensure proper ssl standards.
Oh god. So I decided to try setting up a new site on Trellis/Bedrock/Sage.
Fucking gulp watch is giving me a redlock, so I google gulp watch ssl. First result? My own post lol… I’m starting to appreciate the utility of posting basically everything I encounter on here. At this point I can basically use Google as my reference and almost immediately be taken to wherever I figured it out the first time.
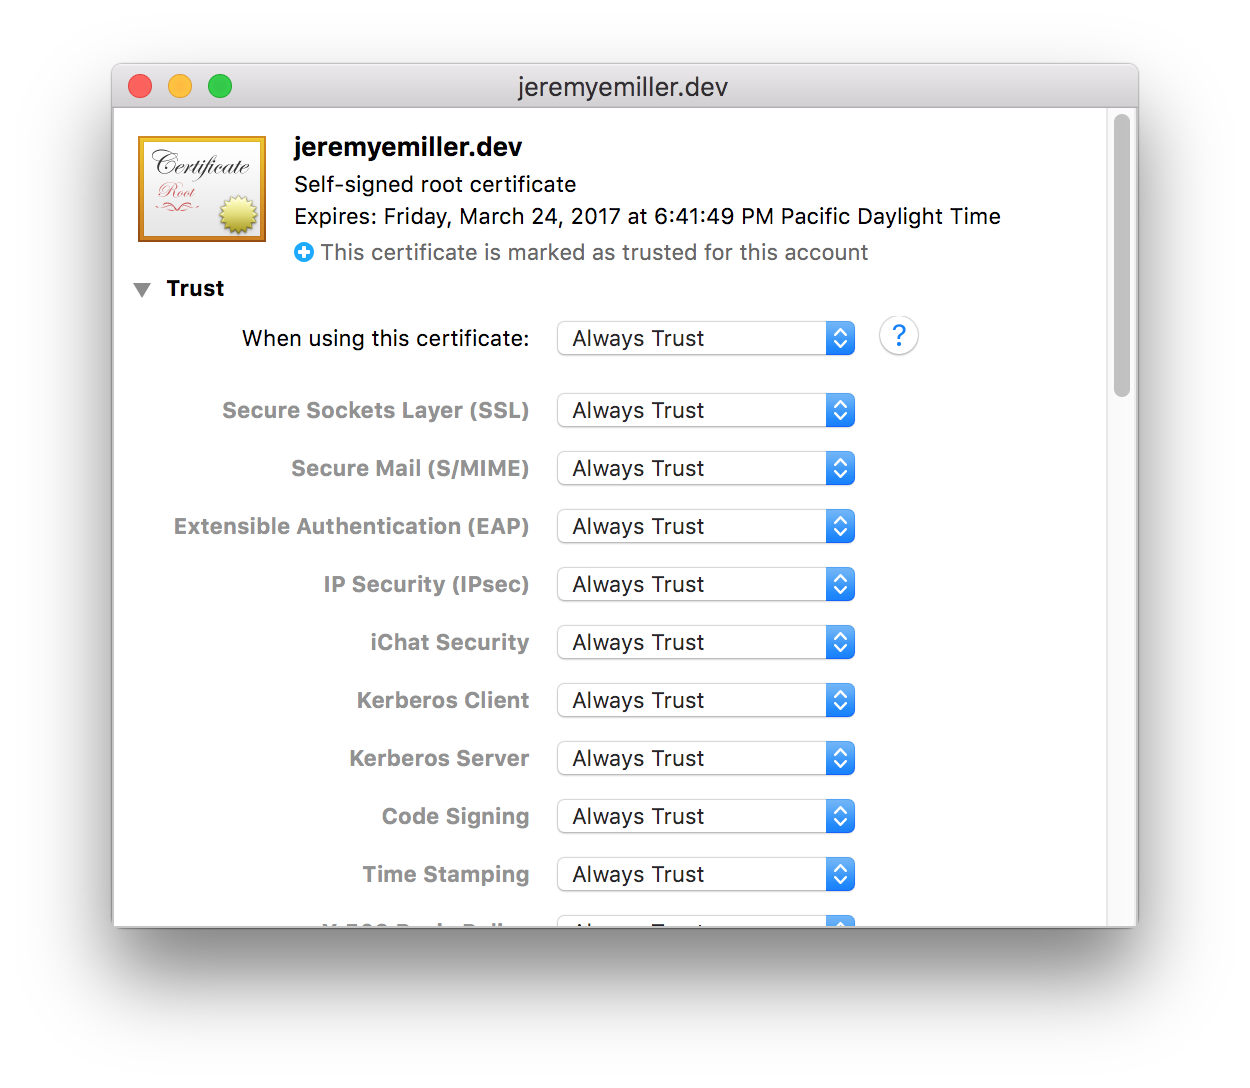
just to add for anyone trying this on OSX - when you go to the “Manage certificates…” option in Chrome, it opens up the OSX Keychain Access app. You can still import the certificate, but then you have to select it, click ‘Get Info’, and under the ‘Trust’ heading adjust the settings there:
Thanks for posted helpful personally for me. I have not once had a problem in this place with a whole bunch of my proxy servers (advanced.name). Now I began to understand some points.
Absolute paths must be used in the devSsl settings. If you’re storing your keys in your home folder like I am, you may want to grant www-data group permissions to the folder, and 0660 write permissions to the files in that folder, just to be on the safe side.
Step 4-6
For MacOS Sierra + Chrome 56 I had to take a slightly different approach.
There are two ways you can get your certificate file to import into your keychain:
Download the .crt file you generated earlier on, from your server to your desktop
Go to Developer Panel (Cmd-Shift-I) > Security tab > View Certificate > point your cursor on the large icon representing the certificate and drag it to your desktop (effectively copying the cert file).
Double click on the .crt file and Keychain Access will open, asking you to import it
When imported, double click on the cert file in Keychain Access, and in the dropdown “When using this certificate” select “Always trust”, type your system password in and close Keychain Access.
Restart Chrome: chrome://restart and restart your watch task: yarn run start
It may take a couple of Chrome reboots / yarn reboots to get the certificate accepted but it’ll happen eventually.
Any help you could give would be great. I can get the red secure to come up for localhost but not for the .dev url. I despraty need to test some google maps geolocate code which requires ssl.